Mixing Acoustic Drums in Superior Drummer 3: Mixer, Bleed, Room Mics and Parallel Compression
A practical guide to mixing realistic acoustic drums inside Superior Drummer 3 using the built-in mixer, mic bleed, room channels and parallel compression before the sound ever leaves the plugin.
Superior Drummer 3 by Toontrack is more than a sound source — it is a full mixing environment modeled on a real multi-mic drum session. The biggest mistake newcomers make is treating it like a one-shot sampler and reaching for outside plugins right away. Almost everything you need to turn raw kit samples into a finished, mix-ready tone already lives inside the plugin: close mics, overheads, room channels, bleed controls and a full channel strip on every mic position.
This guide walks through the SD3 mixer the way an engineer approaches a console at the start of a session: mic architecture, deliberate bleed, room depth, and parallel compression on the shell pieces. The goal is a drum bus that sounds like a recording, not a programmed pattern.
Understanding the SD3 Mixer and Mic Architecture
When you open the Mixer tab in Superior Drummer 3, each channel matches a real microphone position from the original session. Close mics sit on individual drums, overheads capture the cymbals and the overall balance, and room and ambient mics record the kit from a distance. Because these are real recordings captured at the same moment, the relationships between them are phase-coherent in a way no reverb plugin can fake.
Every mic channel has its own processing strip: level, pan, phase invert, and inserts that typically include EQ, a compressor, a transient shaper and extra effects. Build your core tone from the close and overhead mics first, then add room channels for size, and only reach for outside plugins once the internal balance is already strong.
- Close mics: kick, snare top and bottom, toms, hi-hat. Define attack and body.
- Overheads: cymbal definition and the stereo image of the whole kit.
- Room mics: distance, depth and the sense of a real space.
- Bus / Master channels: where you glue the kit together and set overall dynamics.
Using Mic Bleed Deliberately
In a real session, the kick mic picks up some snare, the snare mic hears the hi-hat, and the overheads catch everything. This spill, called bleed, is what makes a recording sound alive instead of assembled from isolated samples. Superior Drummer 3 models bleed faithfully, and controlling it is one of the highest-impact skills in the plugin.
Tightening the bleed gives you a modern, controlled, sample-like sound. Opening it up brings back the natural glue and air of a vintage live recording.
- Select a mic channel and open
Mixer Properties. - Choose
Bleed from Instruments. - For each drum in the kit, set the level slider, polarity switch and on/off button to dial exactly how much spill enters that channel without touching the direct close-mic signal.
Room Mics for Depth and Size
Room mics are where Superior Drummer 3 pulls ahead of lighter drum plugins. The room signal is real acoustic information recorded in the same moment as the close mics, so blending it in adds genuine depth and a three-dimensional feel instead of the artificial tail of a digital reverb. A room channel can instantly turn a dry, in-your-face kit into a big, ambient rock or cinematic sound.
- Pull all room faders to zero.
- Dial in the close-mic balance first.
- Slowly raise the room faders until the kit gains size without losing punch.
- If the rooms start to smear the attack, use the transient shaper or pull them back.
- For a tight modern sound: gate or duck the rooms so they only open on loud hits. For an open vintage sound: let them ring.
Parallel Compression on the Shell Pieces
Parallel compression adds weight and attitude to drums without crushing the transients, and SD3 lets you build it entirely inside the mixer. Send a duplicate of the shells to a heavily compressed bus, then blend that squashed signal underneath the clean kit.
The dry close mics keep the snap and definition while the parallel bus adds body and sustain. This is how engineers get drums that hit hard on small speakers without sounding over-compressed.
- Create a new bus in the mixer and name it
DRUM SMASH. - Route only the isolated close mics for kick, snare and toms to this bus — no bleed-heavy channels.
- Insert a compressor with ratio 8:1 or higher, fast-to-medium attack, medium release.
- Push the input until you see 10 to 20 dB of gain reduction.
- Blend the smashed bus underneath the clean kit until the drums feel fuller, then back off until it sits naturally.
Finishing the Bus
Once the close mics, overheads, rooms and parallel bus are balanced, treat the SD3 master channel like a drum bus. A gentle bus compressor for cohesion, a touch of EQ to carve space for the kick and snare, and subtle saturation will tie the whole kit together. Because the mix already sounds like a real performance, you typically need far less corrective work in the DAW afterward.
Export stems for kick, snare, toms, overheads and room if you want full control back in your session, or commit to a stereo drum bus if the in-plugin mix is already there.
Frequently asked questions
Should I mix drums inside Superior Drummer 3 or export and mix in my DAW?
Do as much as you can inside SD3 first. The internal mixer has access to the real mic bleed and phase relationships that make the kit sound like a recording, so build your core balance, bleed, room depth and parallel compression there. If you want maximum flexibility later, export individual mic groups as stems (kick, snare, toms, overheads, room) and handle final glue, automation and effects in your DAW.
Why does my Superior Drummer 3 parallel compression sound messy?
You are almost certainly sending channels full of bleed to the parallel bus. A fast, high-ratio compressor reacting to cymbal and hi-hat spill gives you a pumping, unpredictable result. Send only the isolated close mics for kick, snare and toms, and remove cymbals from any room channel you plan to compress hard.
How do I make programmed drums in SD3 sound more human and less robotic?
Use bleed and room mics on purpose, add velocity and timing variation to your MIDI, and rely on round-robin samples to avoid identical repeated hits. A little extra bleed and a touch of room ambience restores the natural spill of a live session — the main thing missing from tightly programmed, isolated drum patterns.
Do I still need external plugins after mixing in Superior Drummer 3?
Usually very little. SD3 includes EQ, compression, transient shaping and effects on every channel, so the kit can be fully mix-ready inside the plugin. Outside plugins are useful for final bus glue, creative saturation or matching drums to a reference, but they should be a finishing touch, not the foundation of the sound.
Recommended Related Products
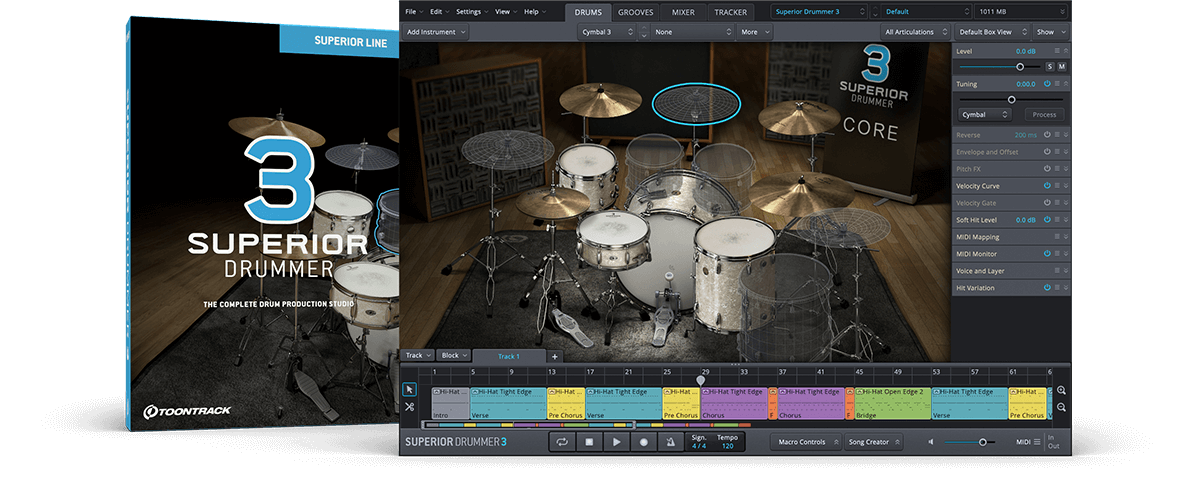
Toontrack Superior Drummer 3
Ultimate drum production studio with a massive 230 GB sound library.